 |
| LIAZNAVZDY | CTM |
ĂšVOD GALERIE ROZESTAVÄšNO RADY a TIPY RECENZE MONOGRAFIE TECHNIKA VĂťSTAVY ODKAZY O MNÄš |
| ENGLISH MENU | |
|
|
| NOVINKY | |
|
1.12.2017: Aktualizace fotogalerie |
|
| ------- | |
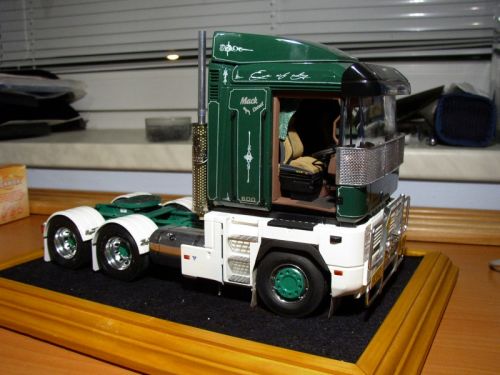
(Italeri, 1/24)
Part one: the beginning
The original idea came from my friend from Slovakia – Igor Hakszer – who gave me a few B&W copies of TMW articles back in 2002. He didn’t know that this act will affect my net 6 years of life at that time and nor did I. It was too late, when I realized it won’t be as easy as I planned and there was no way back already.
The initial idea taken from Brian Fisher’s model was quite simple: following his path and building up a double drive Magnum in Australian style. Chrome rims, double exhaust pipes, bull bar, stone guard, orange marker lights and bull lights…you know what I mean, right?
As Magnum was rather only a marginal product of Mack trucks Australia, it was quite difficult to find any closer info on this type of truck. I had a slim brochure and a simple datasheet only and that was it. I have collected a limited number of Mack Magnum’s photos during the years but no closer shots so far. That brought me into many trouble in the early stages of model’s construction especially.
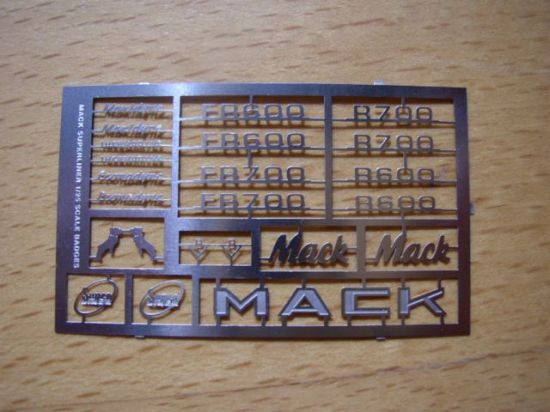

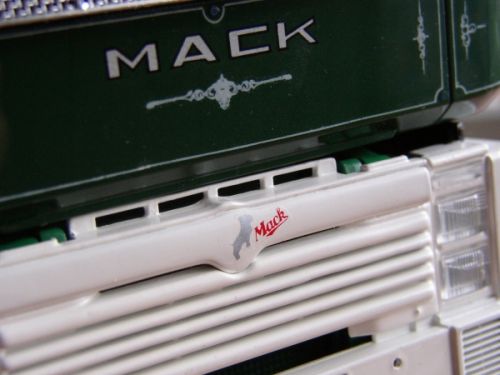
The amount of information I had on the real thing also had a deep influence on the length of aftermarket part’s list. I started with #716 Italeri Renault Super Magnum kit (Brian used older AE Magnum) as a basis followed by Auslowe Magnum double drive set, Auslowe Magnum RHD dash and stoneguard and Auslowe modern style roof marker lights and rear axle ribbed wings, KFS exhaust pipes, KFS super single front wheels, KFS etched Mack re-badging set and slam locks, Alclad chrome lacquer and a batch of Kangaroo and KFS decal sheets. All together for about 100 GBP in times when one British Pound was almost as twice expensive as now. I also decided to order Clint Freeman’s Cummins M11 engine as soon as I found out that there’s no place for V8 Mack engine in the real Mack Magnum as it is powered by huge Cummins Signature engine. Purchasing Renault Magnum sunvisor from JCL on my first Jabbeke show solved my serious problem with finding an appropriate sunvisor. Fine P&W scrolls and pinstripes decal sheet and company logos (Alps printed) played the main role when creating the truck’s livery.
All together with some fine details from Italeri accessories sets, my scratchbuilt parts (fuel tank, most engine manifolds, battery boxes, rear axle mudguards and most of engine compartment details as well as engine head and block parts) and printed decals this is virtually all I used during my work on Mack Magnum model.
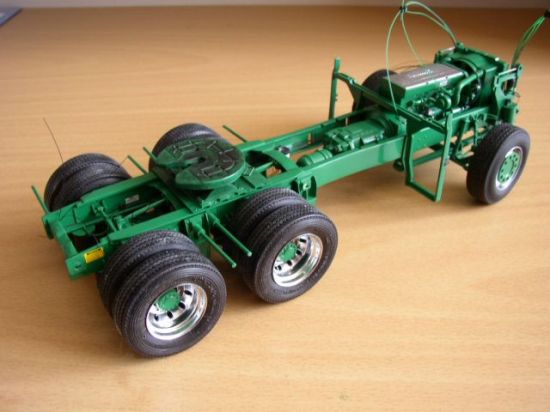
As you can see after quite a lengthy introduction (which I still consider brief), building this model is a long story and became a very personal for me. I was very proud to present finished tractor but this is only a half way with two trailers (in progress) following. Here and now, I would like to focus on tractor itself and leave both trailers unnoticed.
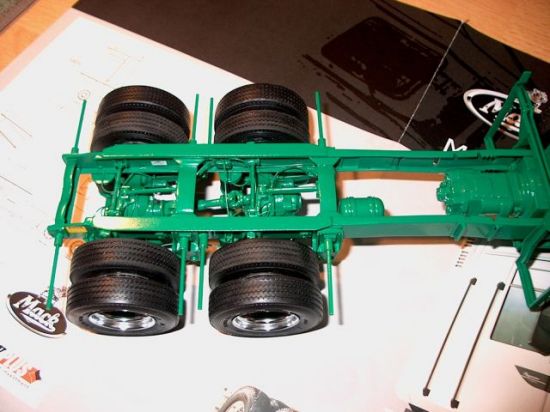
Part two: The initial progress
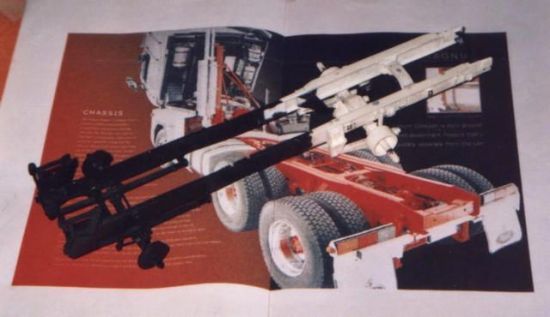
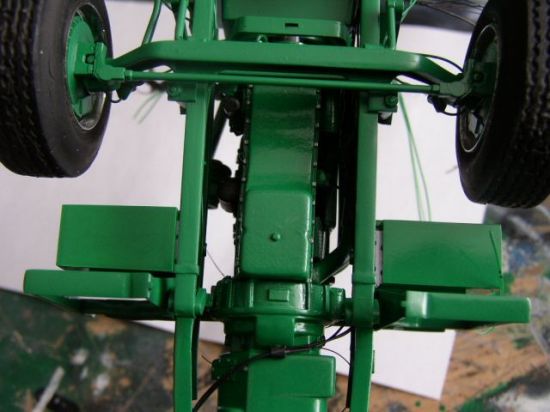
It started on summer 2002. There’s only a little to show from Magnum’s early stages as I didn’t have a digital camera at that time. It stared as usually with chassis assembly. I cut the frame rails according to Auslowe’s instruction sheet and extended the length with resin frame rails from Auslowe which required a lot of sanding and filling as all the parts (frame rails, crossembers, driven axle, suspension, shock absorbers…) were full of air bubbles. Tamiya putty did the job well. Today, I’d rather spend my money on buying another Magnum kit and use the original plastic parts. The Auslowe set consists just of copies of the original kit parts and cost the same. Just after finishing the frame with suspension and axles, I received a picture showing the rear part of the frame having totally different shape than Auslowe set presented. I cut off about 5 mm from the chassis rails and modified the rear crossmember.
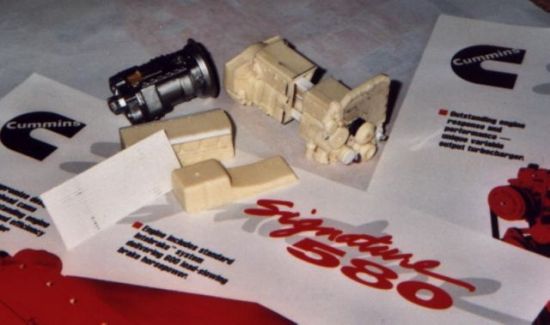
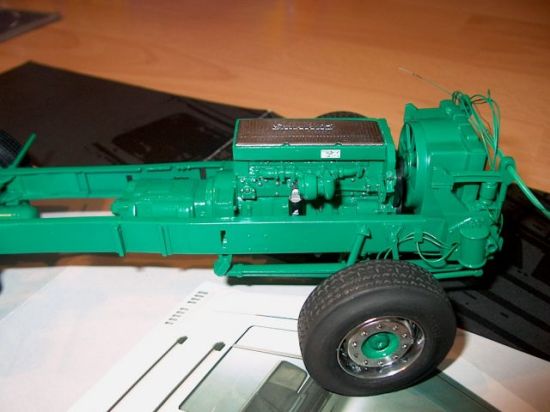
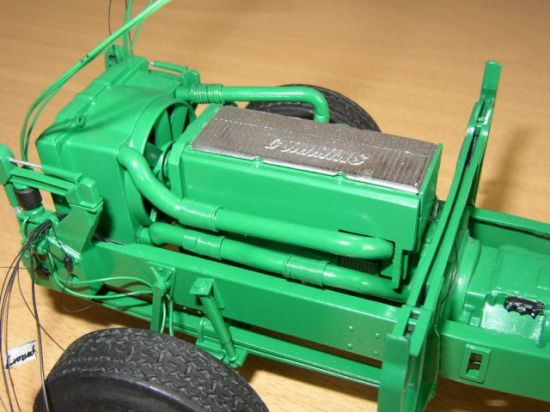
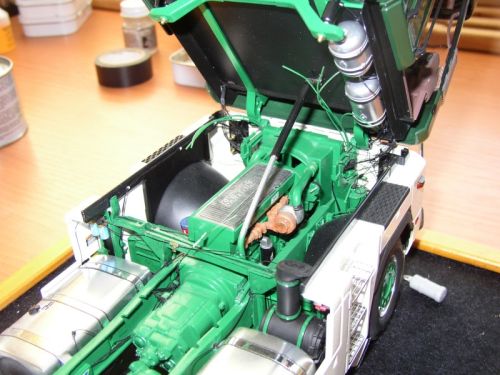
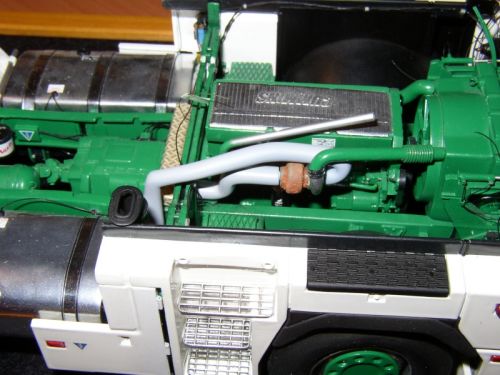
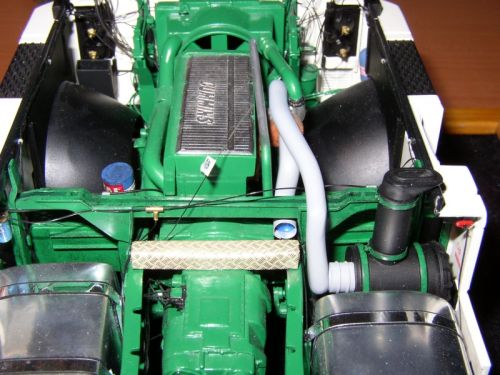
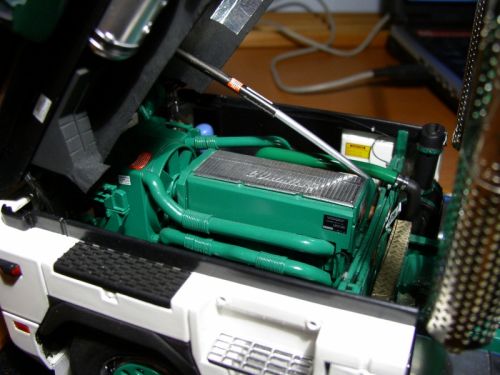
The engine was another story. The M11 Cummins (great quality of CFC castings) presents a lot smaller engine than the Signature in the real thing. That was an expected fact. I decided to use the basic shape of the engine and (while receiving engine brochures from USA) I started on re-sizing and modifying the engine design. The only part from the Italeri kit that remained was the cooler. After the engine got some real dimensions, I scratched the valve cover and attached all of the surrounding engine equipment from alternator to all the manifolds and a gearbox that comes from Revell’s Pete 359 kit.
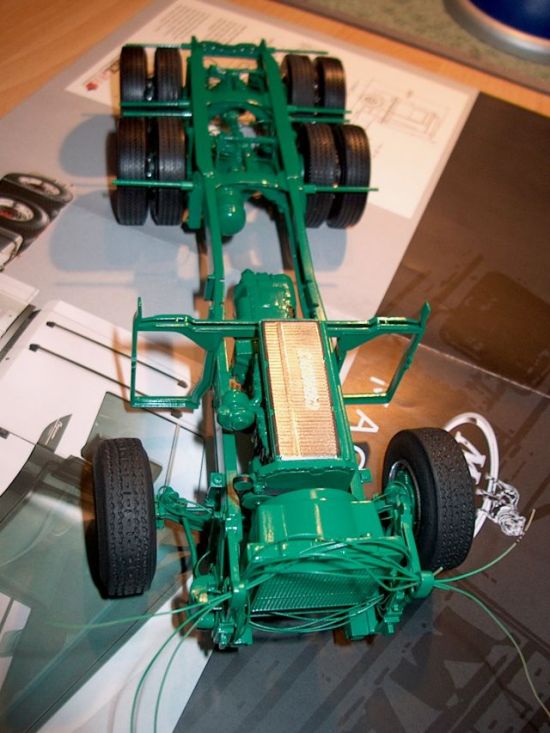

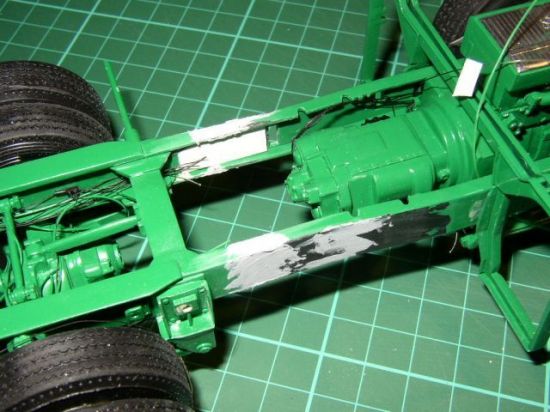
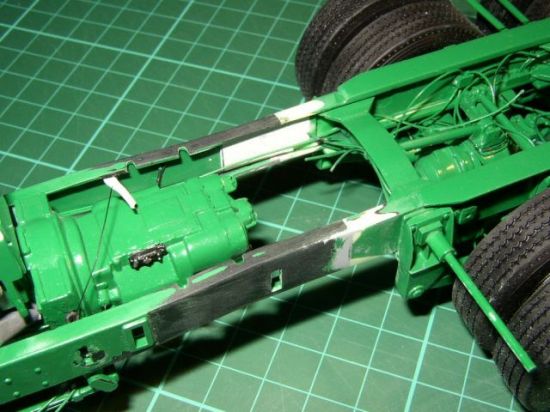
Few days before leaving to Belgium, I found out that a disaster happened. When following the Auslowe’s instruction sheet, I did not check the model wheelbase. The real Mack’s chassis was a lot lot shorter then the one presented by the Auslowe model parts. The only thing to do was to cut the finished and sprayed chassis into pieces, cutting about 10 mm of the frame rails off, glue the chassis together and fill, sand a spray it again. What a pleasure!
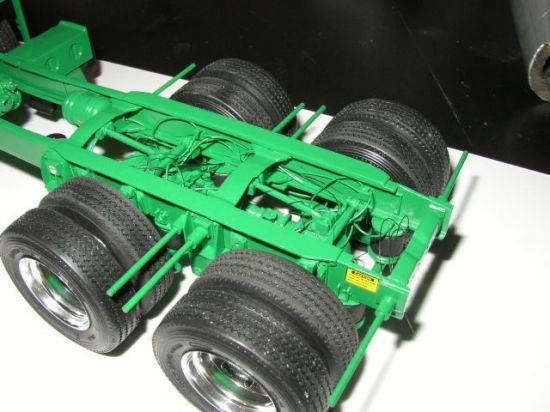
Part three: Further progress
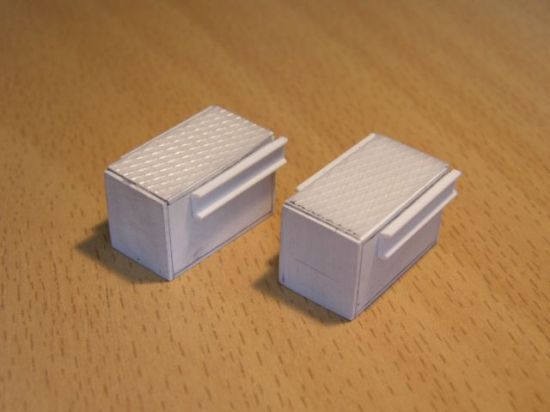
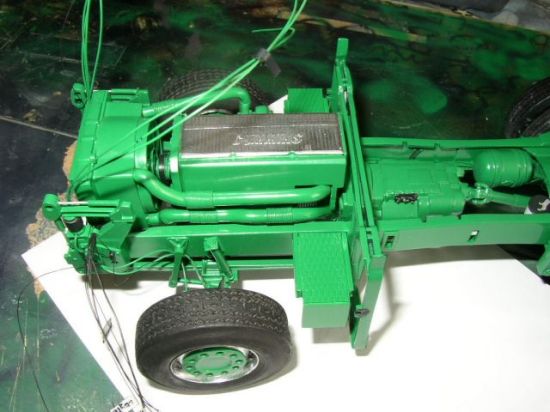
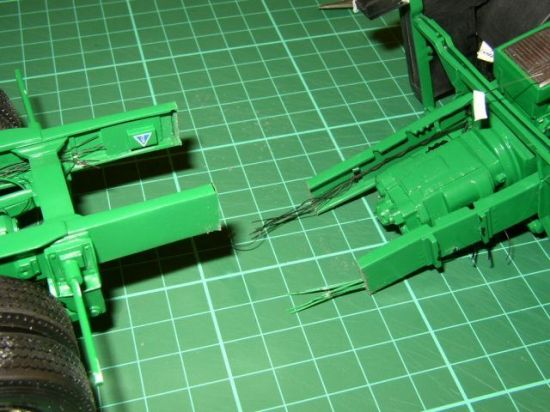
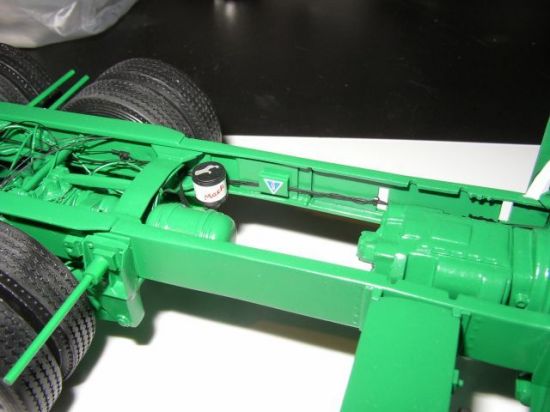
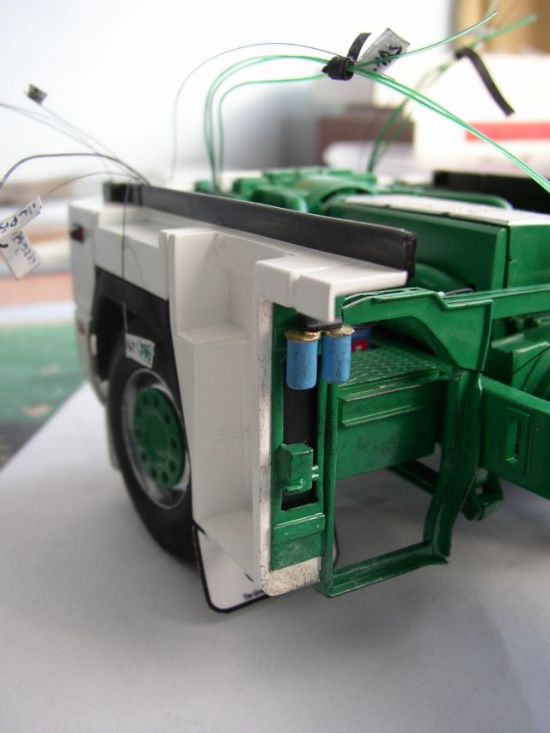
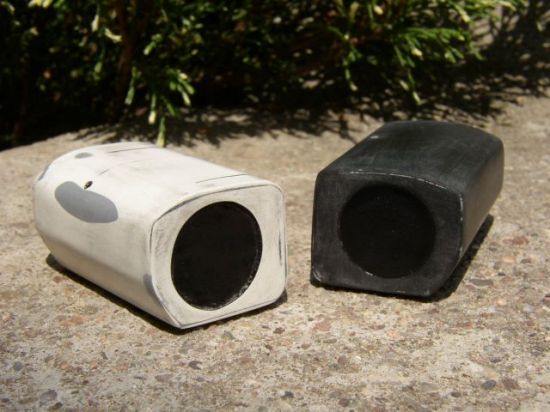
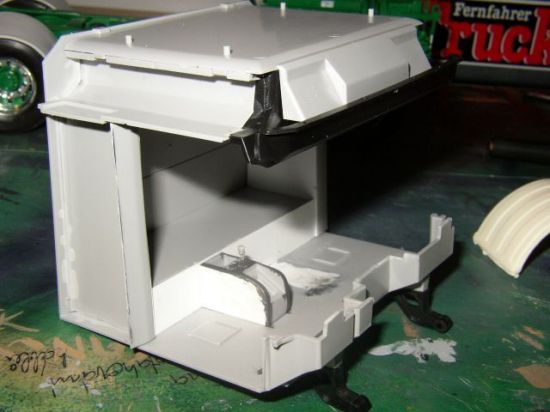
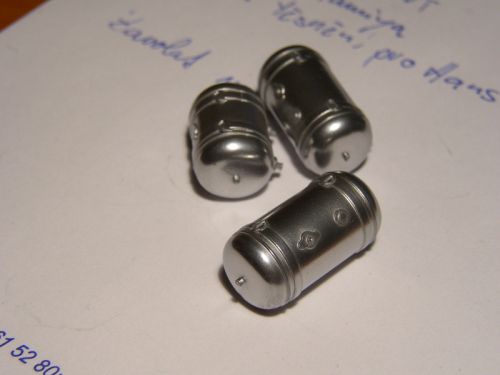
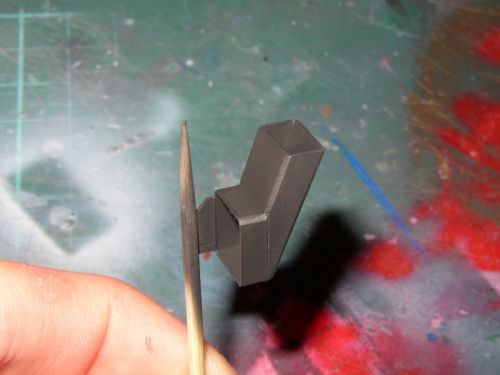
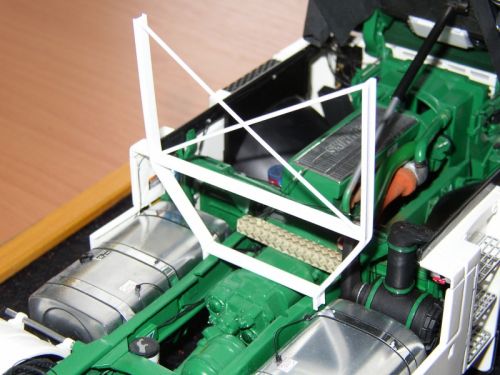
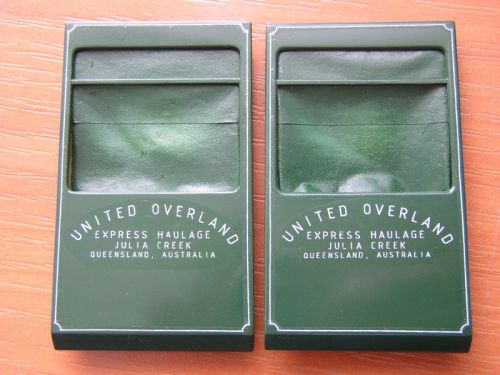
It took me a long time to find out what the position of batteries on the chassis is. It is different, comparing to European Magnums. Mack Magnum’s brochure says the batteries are behind the wheel arches on both LHS and RHS of the chassis so I took the measurements of an average truck battery and used it for building up two battery boxes covered with catwalks and fixed them on the chassis, right behind the front axle.
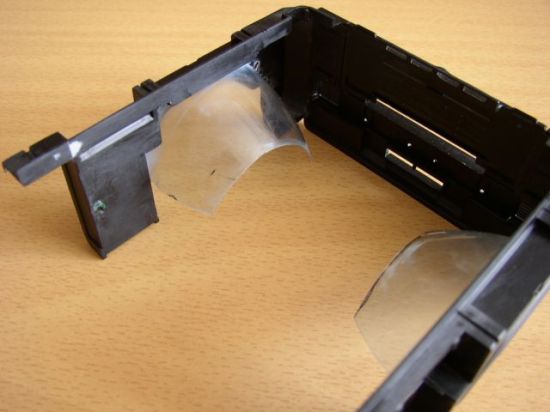
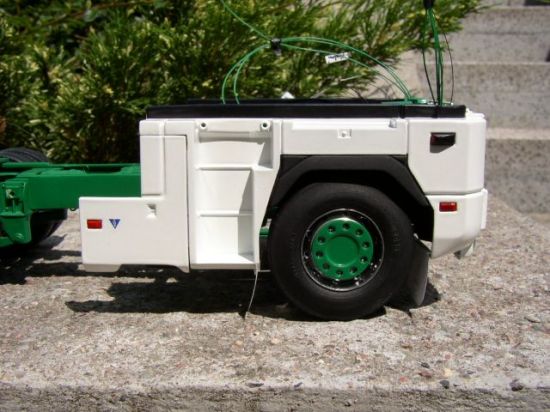

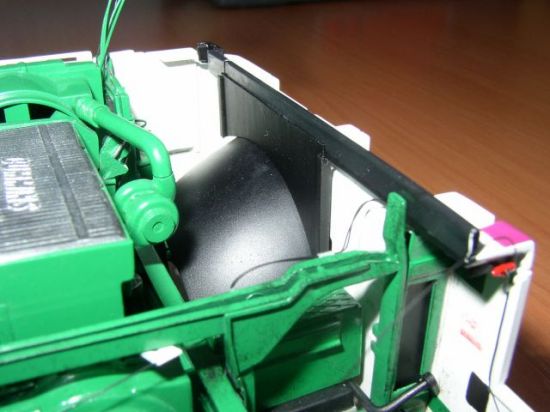
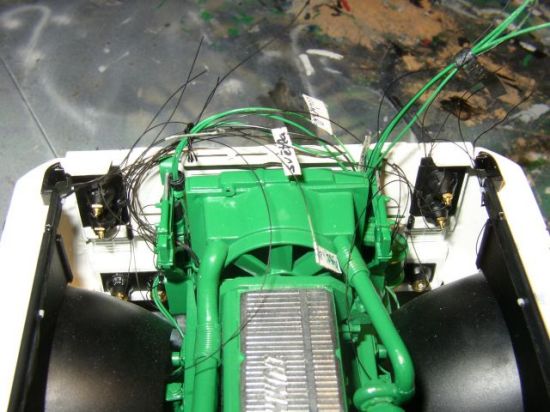
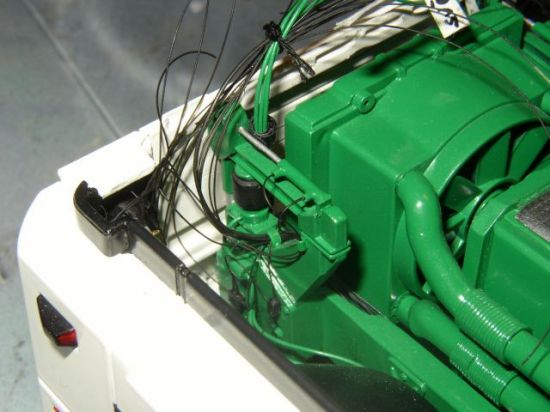
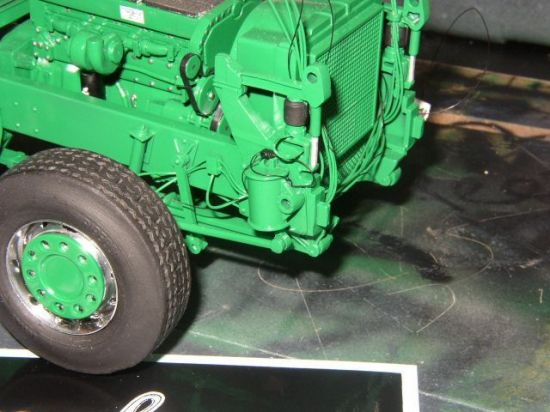
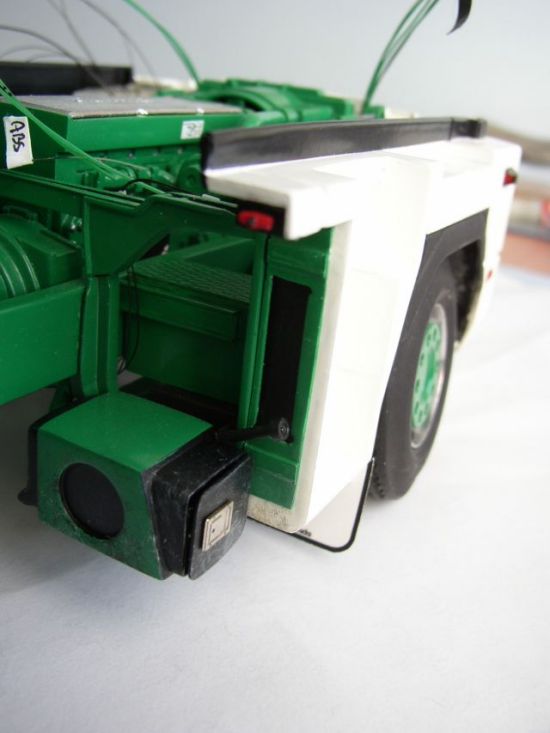
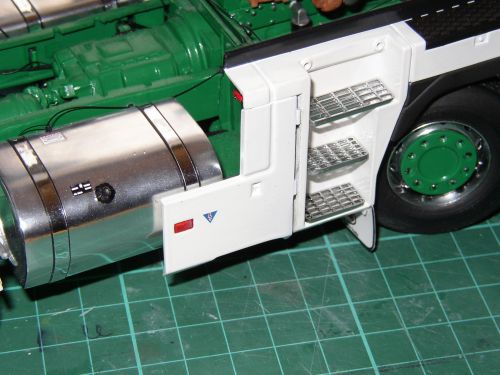
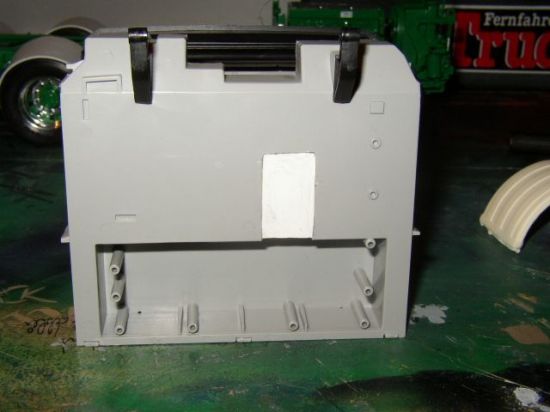
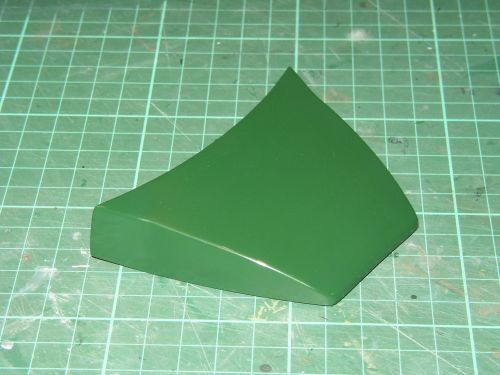
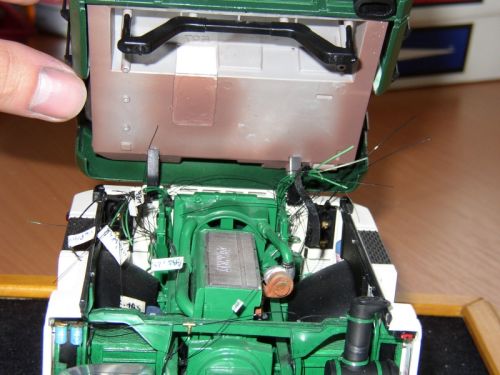
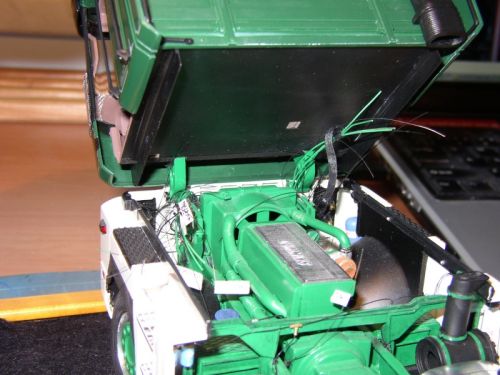
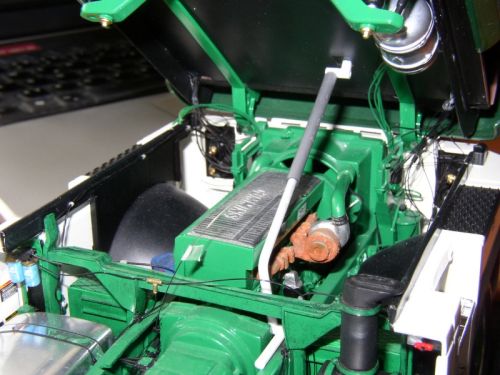
Next thing to do was the whole engine surroundings. That means cab steps and front bumper from the outside (all sprayed white) and wheel arches and loads of details from the inside. The wheel arches shape was the largest problem as its generally a rounded shape which would be a bit tricky job to scratch built. Two thin membranes cut out of a mineral water bottle of an appropriate shape solved the problem and few more scratch built and black sprayed panels made the engine compartment good looking. The rear parts of the lights were scratch build and wiring was done all around.
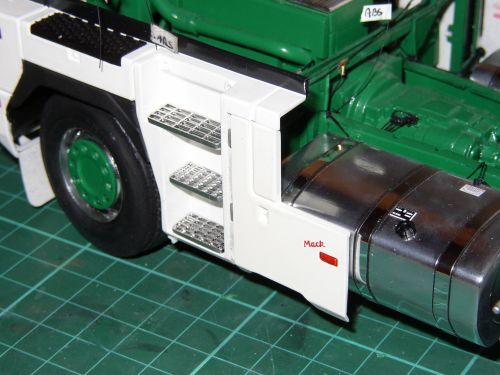
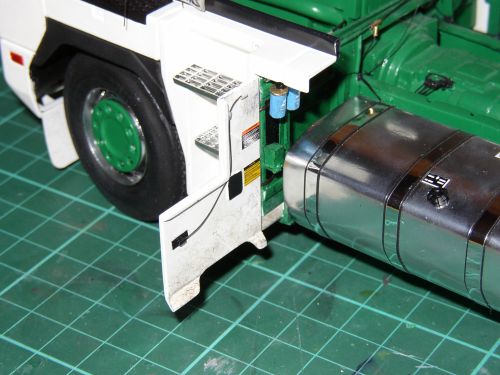
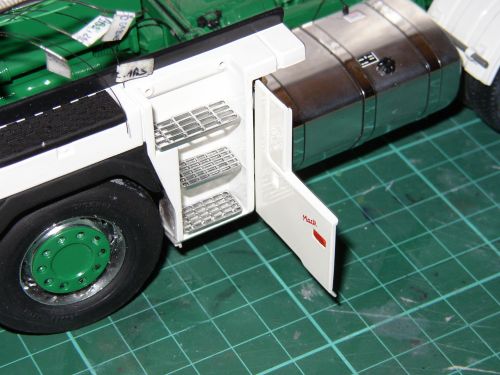

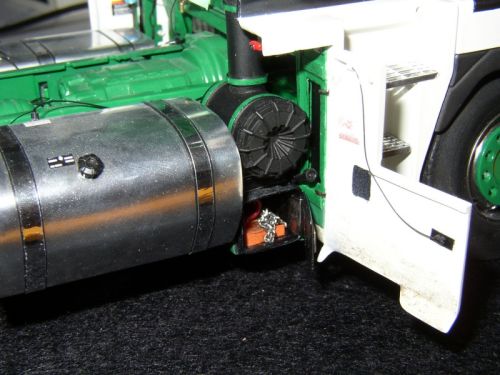
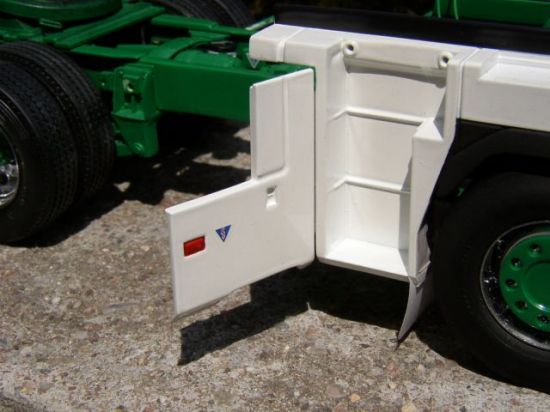
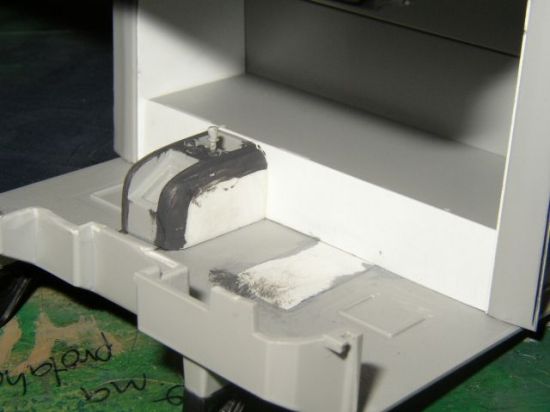
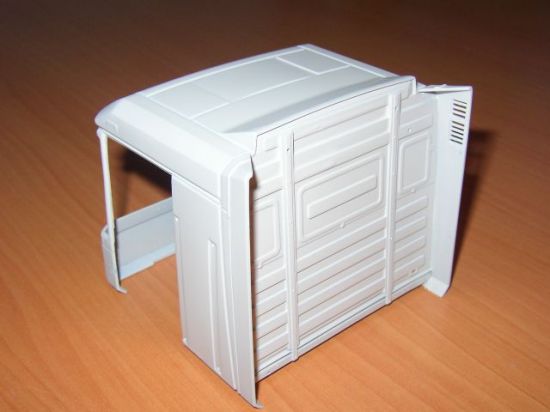
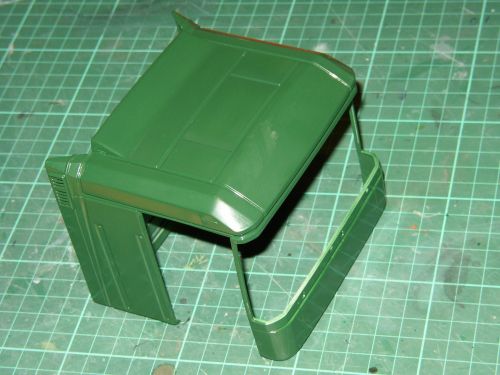
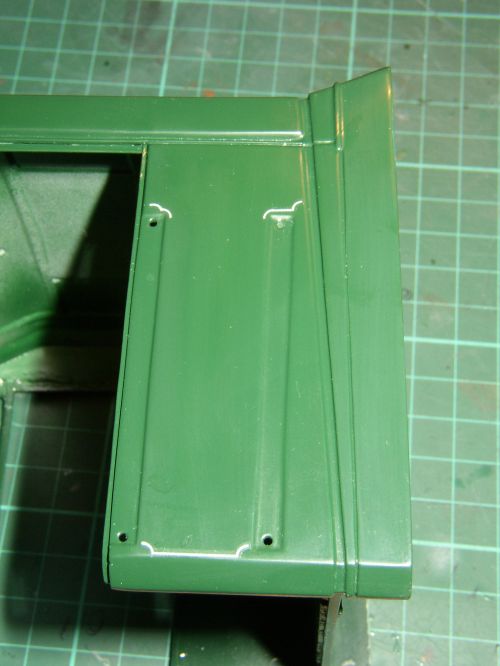
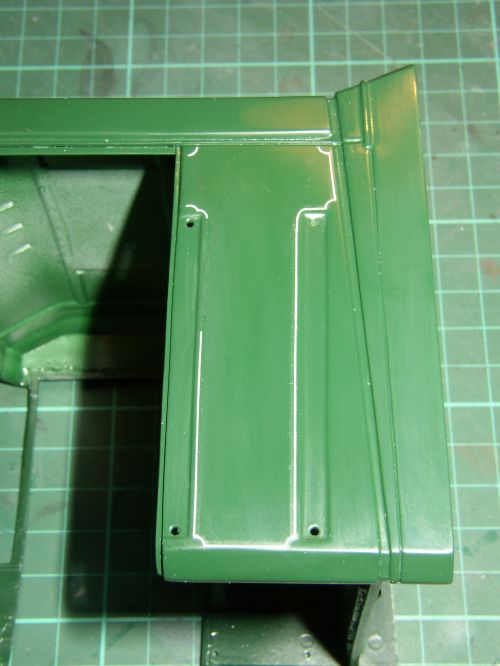
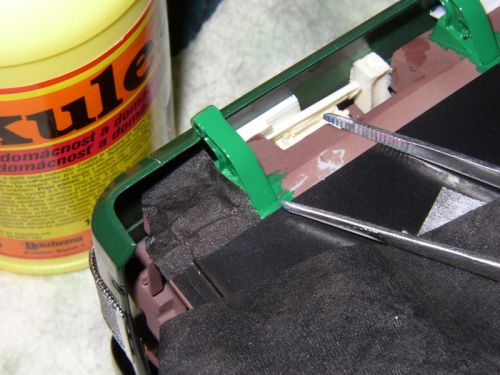
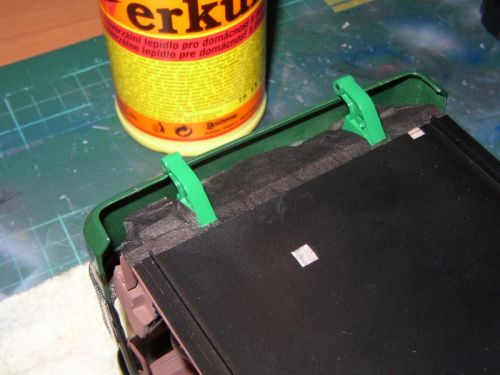
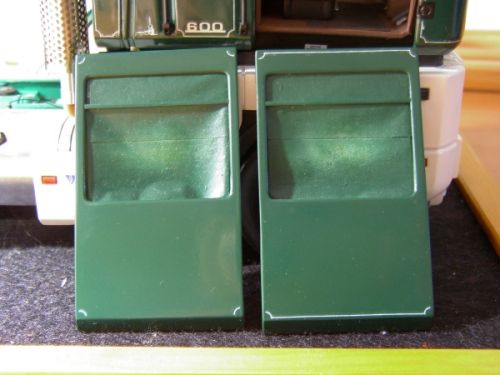
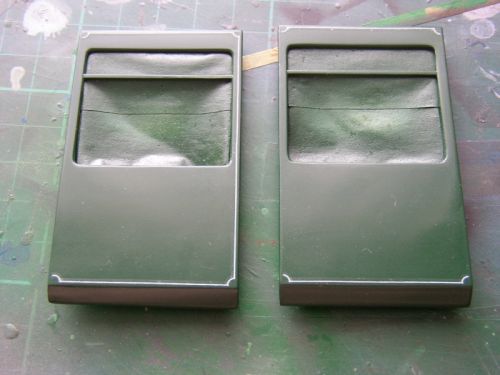
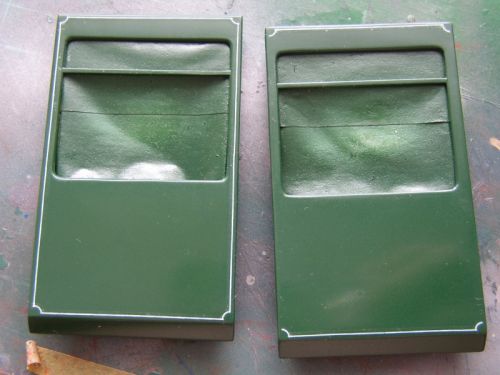
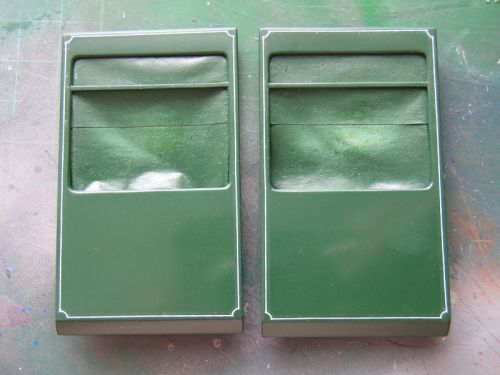
I also took a lot of patience to the side opening service panels, where few more parts were scratch built as I hinged the panels and installed all of the relevant stuff (small toolbox, cab tilting pump, fuel filters and battery switch).
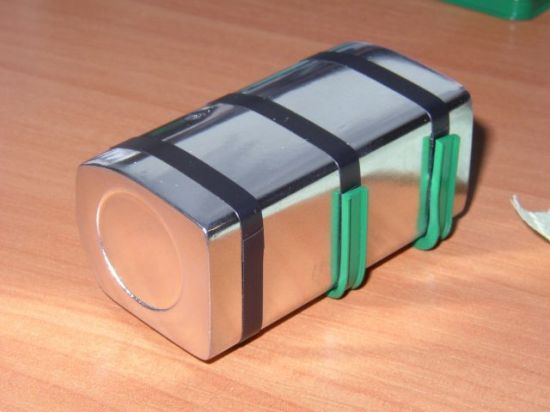
Moving from the front part of the chassis further to the back, I decided to scratch built the RHS fuel tank. It was one of the largest scratch built object I made up to that time so it was a bit tricky job and required a lot of filling and sanding. Of course, all the lights were painted with silver for the front lights and clear Humbrol orange for the marker lights all around the front part of the truck but that’s just following the instruction sheet and isn’t worth mentioning.

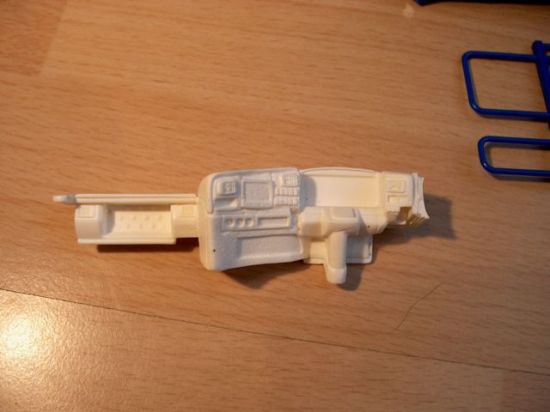
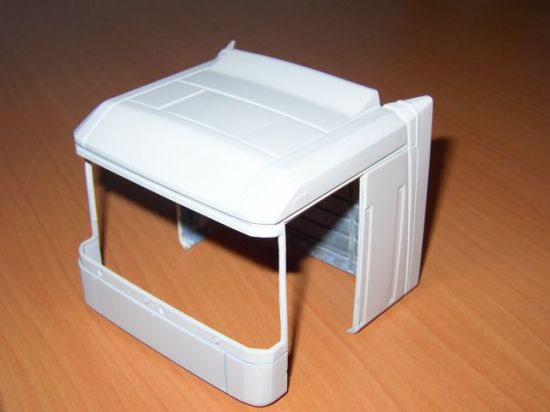
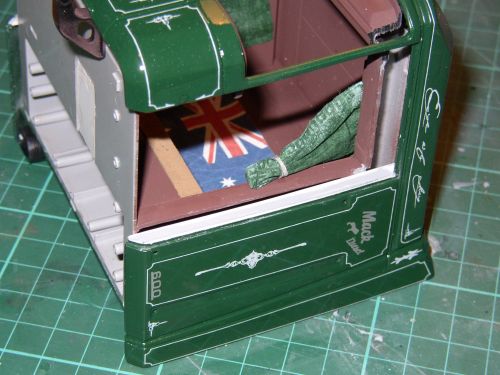
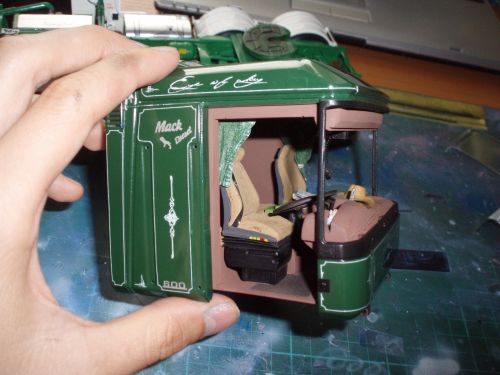
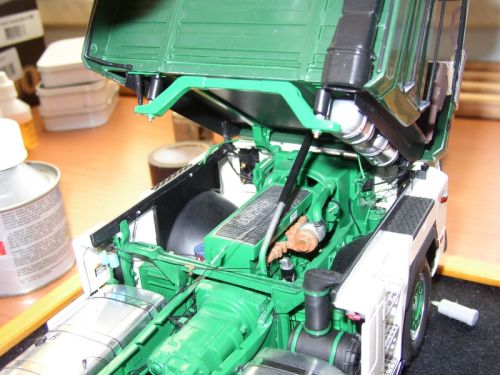
I moved to the cab, cut the doors off and assembled both the exterior and the interior with filling and sanding the Auslowe RHD dash and moving the gearstick panel and pedals to the opposite side of the cab. The JCL sunvisor made of black resin required some patience with filling and sanding as well.

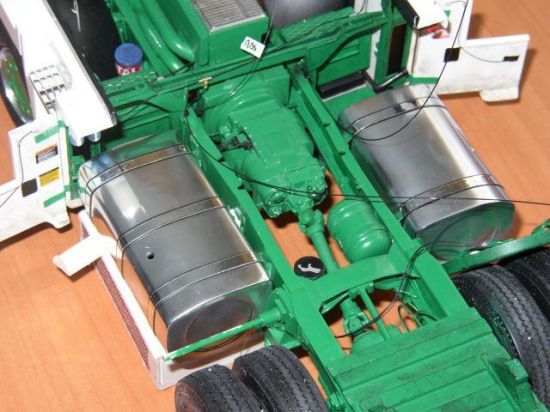
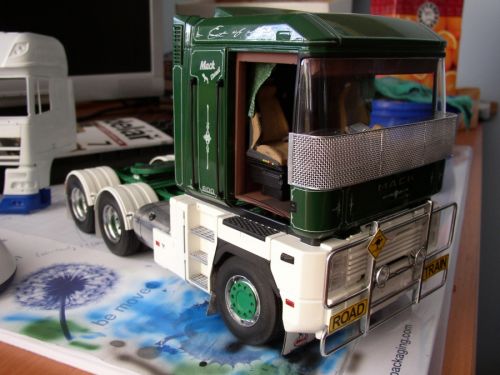
The bullbar comes from the kit as I liked its design. I sprayed it with Alclad (as well as the stoneguard and fuel tanks) and fitted with “ROAD TRAIN” signs and bulllights. The LHS tank comes from the kit; just the support brackets are selfmade to suit to the RHS tank.
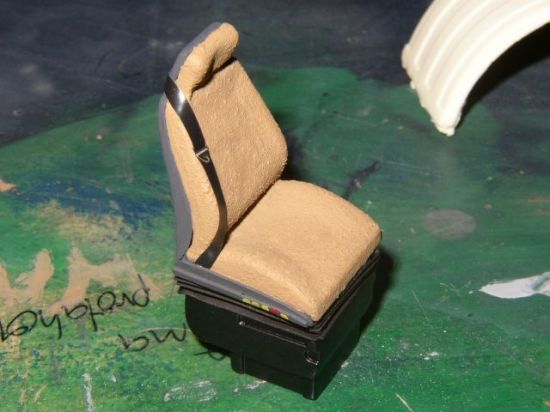
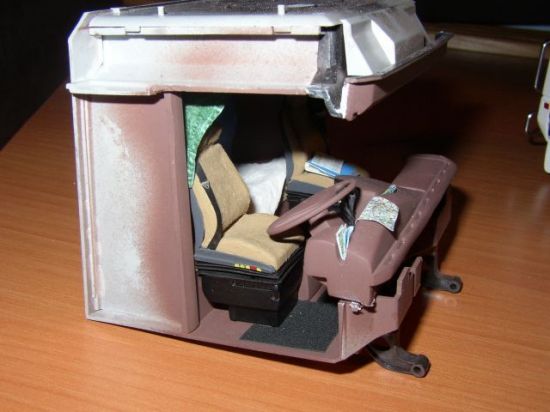
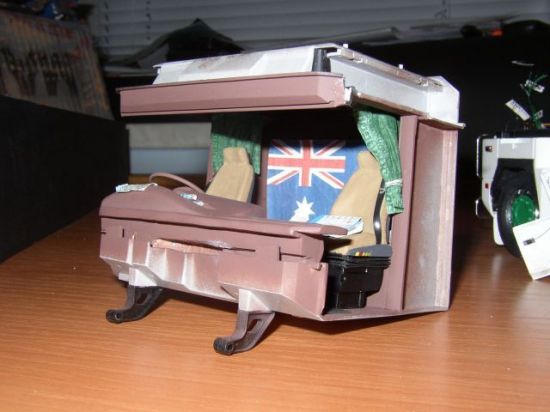
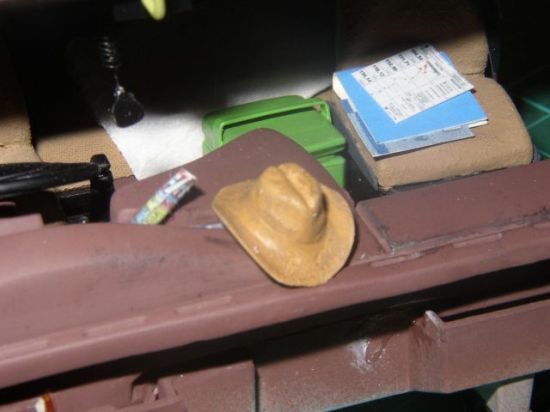
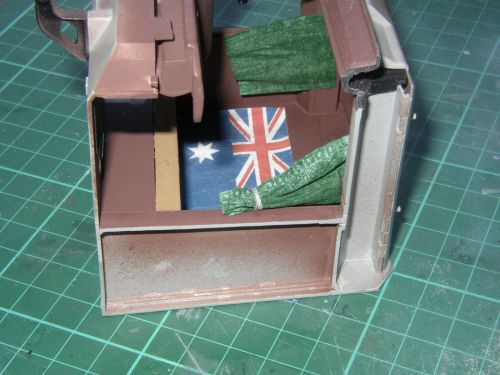
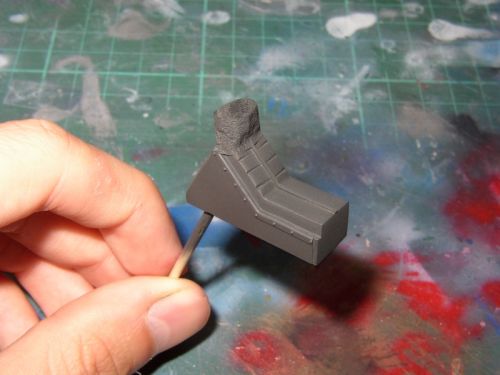
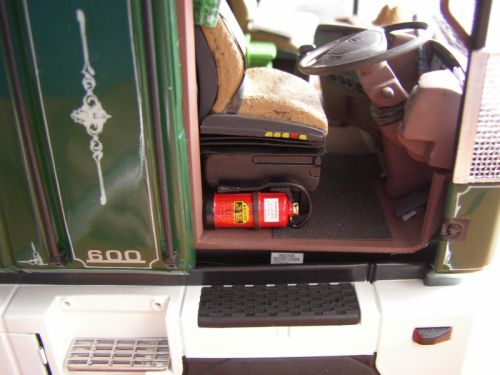
Just after finishing, the interior panels and dash were sprayed with flat brown. Seats were heavily modified and the open doors will let you see it all clearly. Fine details (Aussie flag, curtains, CB radio and a couple of magazines) were added to the interior.
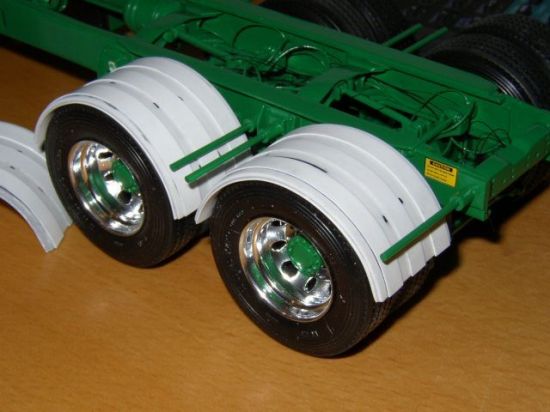
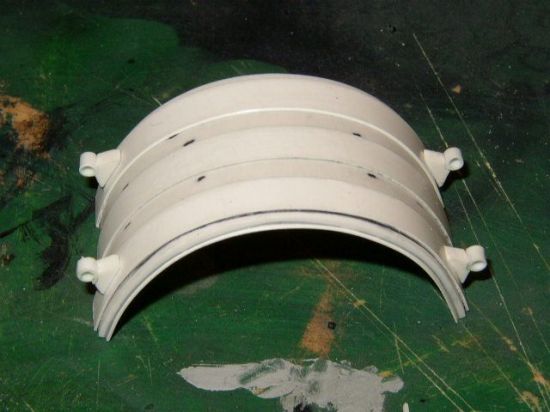
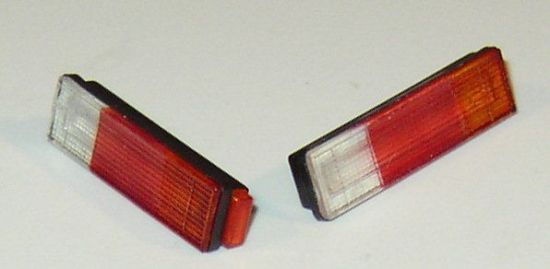
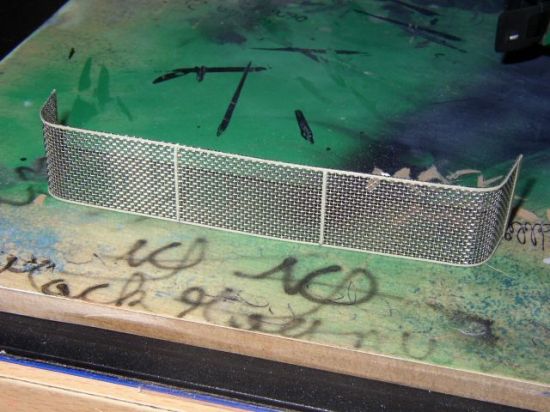
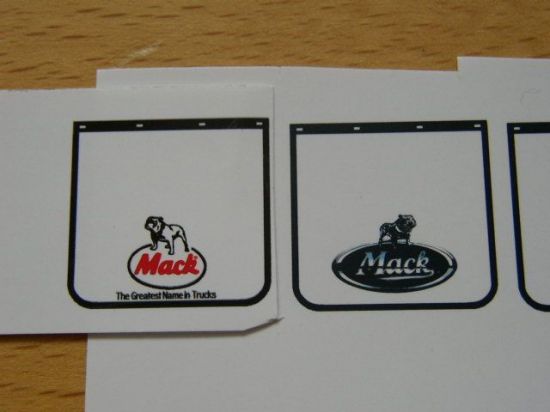
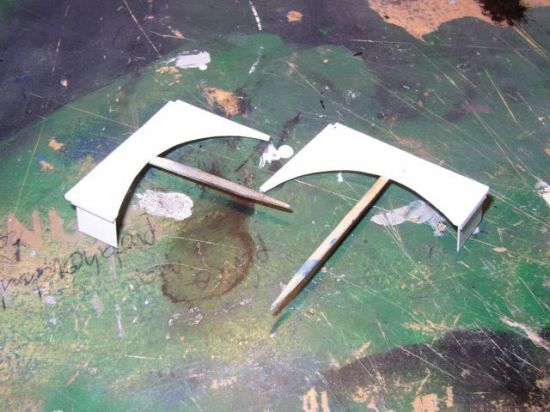
After weeks of filling and sanding the Auslowe ribbed Aussie style mudguards I rather decided to scratchbuild my own ones which also took some time but provided accurate result. The rear lights come from the original kit and all the mudflaps were printed and cut off a gloss photo paper sheet.

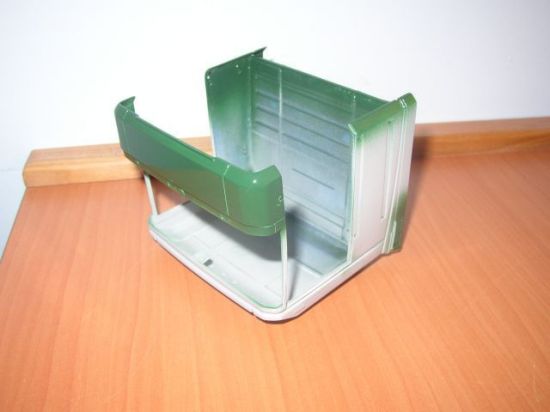
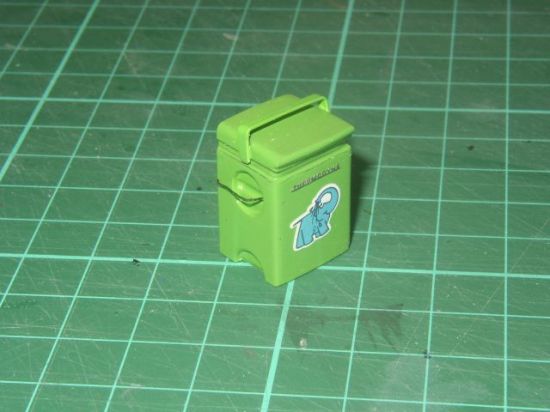
The year four of building Magnum meant only a few days of work as I was right in the middle of my studies which took most of my free time. The problem also was that I messed up spraying the cab with Humbrol’s dark green. The coat was full of dirt and dust as I didn’t clean the cab properly before the job. That put the model aside for a long time to think of an appropriate solution which was found about a year later. Agama, Czech company producing paints for modelers, provides a special liquid that can remove old coats of paint on your model without damaging the plastic. Using this, the cab was clean virtually in a few minutes. Sprayed with Gunze’s Mr.Surfacer 1000 the cab was ready for another coat of dark green. Adding a selfmade fridge to the cab interior, I decided rather to move to the trailers and leave the brittle cab aside for some time.
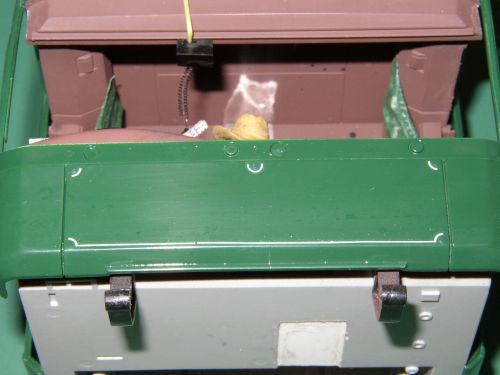
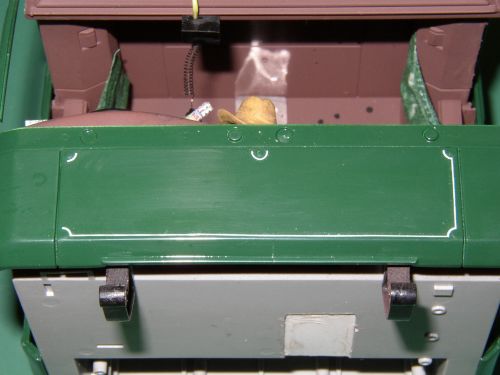

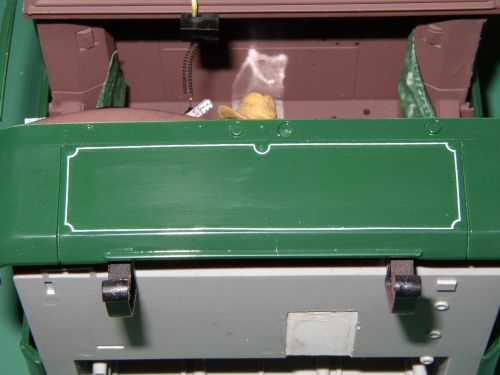
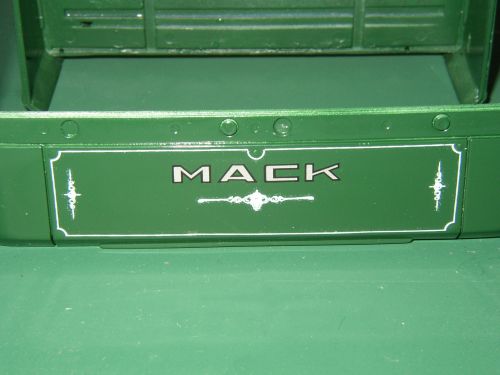
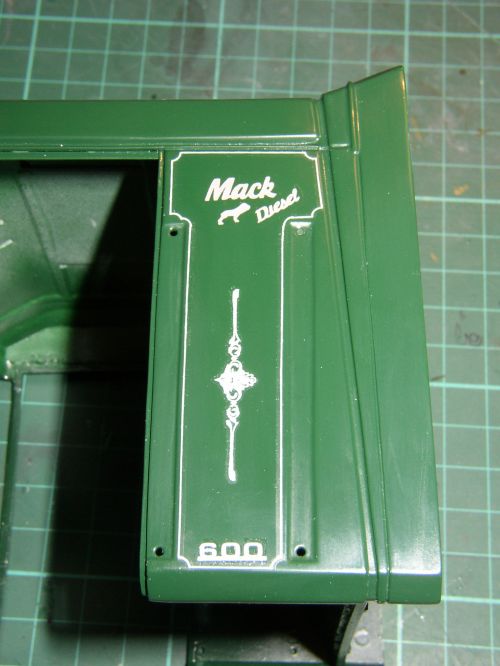
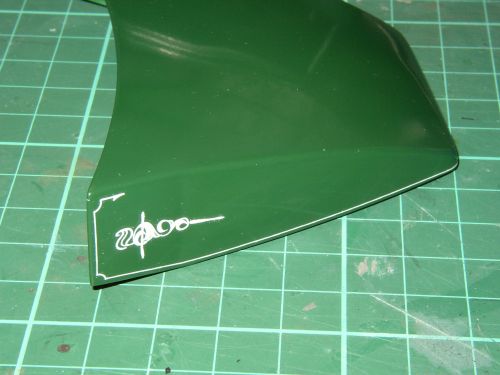
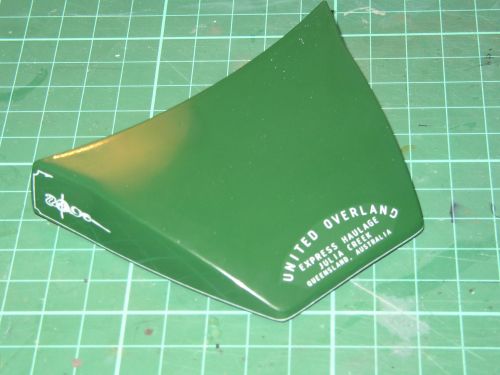
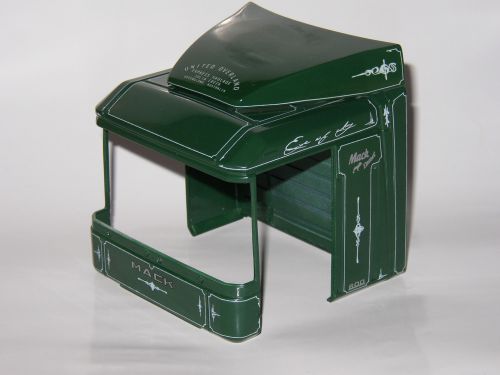
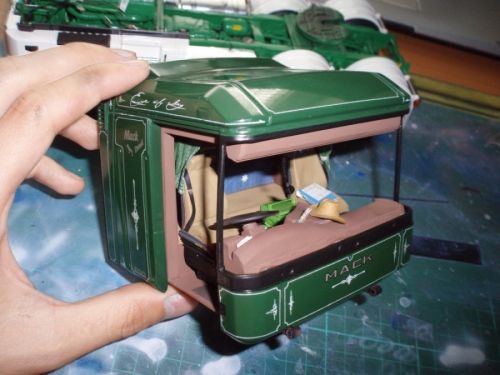
I focused on the tractor few weeks later as I found a solution with the company logos printing. A guy over here in Czech was willing to print out a couple of company logos in white on his Alps printer for a very fair price which allowed me to start working on the cab’s decals. I spent some nice weeks together with hot water and P&W scrolls and pinstripes decal sheet working on the cab. It was a bit tricky job but the result was amazing. Covered with few coats of Humbrol gloss clear lacquer you can’t see any of the decal’s borders.

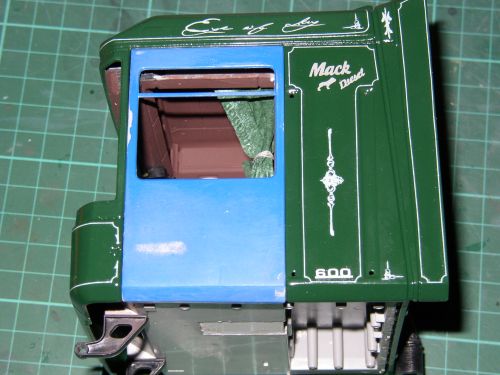
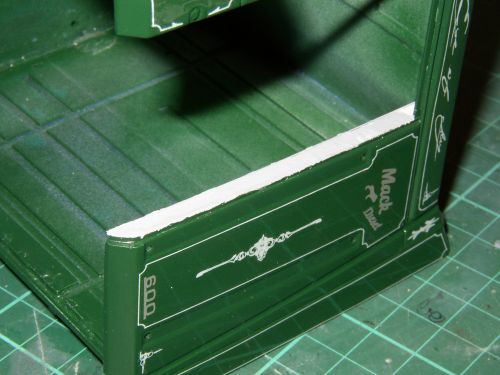
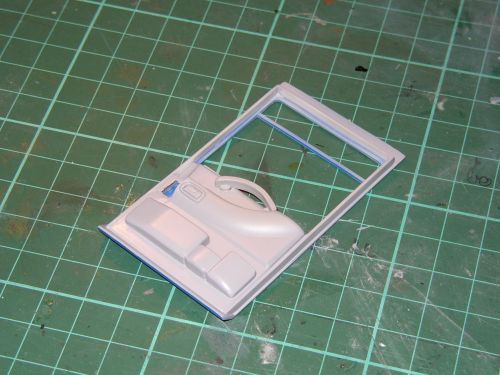

A few stripes cut off a 1 mm thick plasticard was needed do modify the doors and also cab inside panels to make the whole surroundings good looking and provide some space for door locking mechanism.

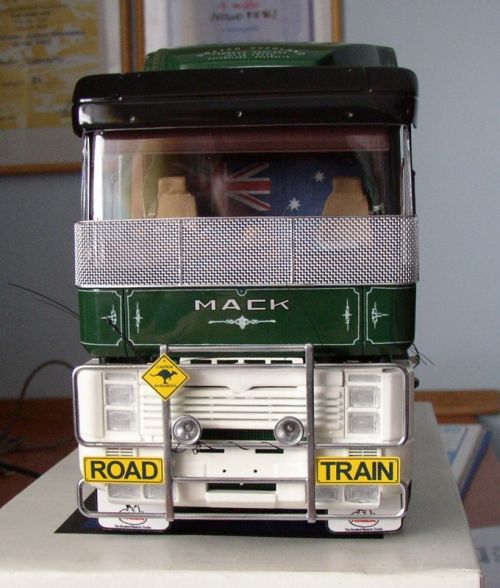

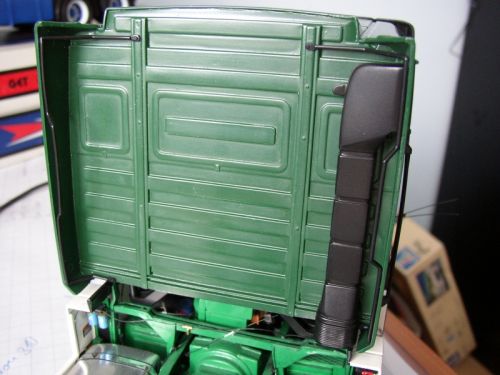
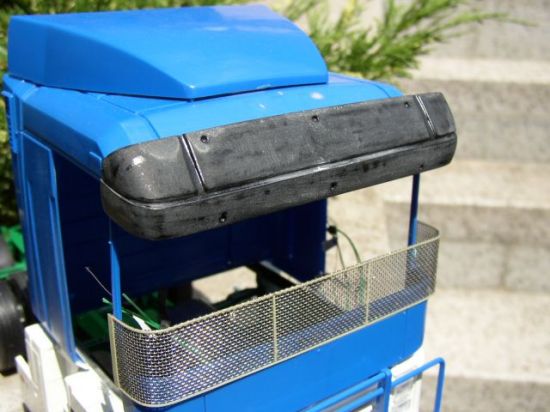
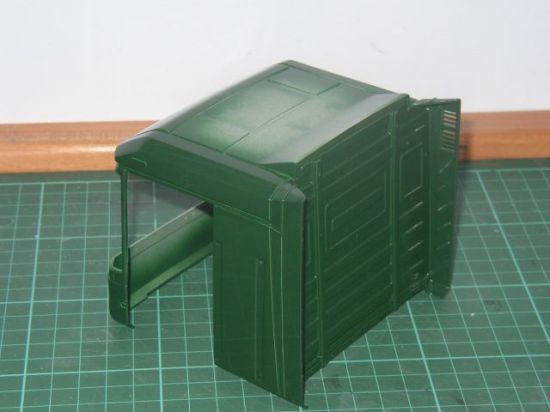
Polishing the cab clear coat and finishing the door panels, spraying it brown from the inside and gloss green from the outside, applying the decals and Humbrol clear coat started the last year in Mack Magnum’s progress. I used Tamiya masking tape for spraying the windscreen surroundings black. Windscreen, modified w. wipers and the stoneguard were fitted to the cab followed by the sunvisor and the air intake on the rear cab wall and the air intake filter was fitted to the chassis.

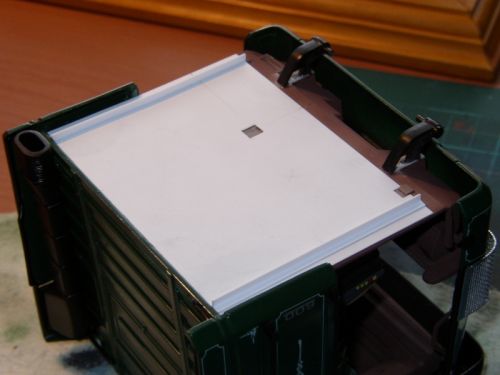


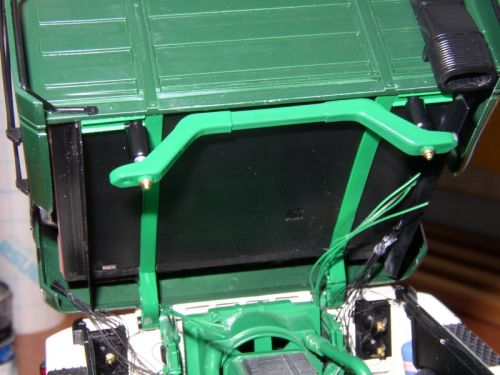
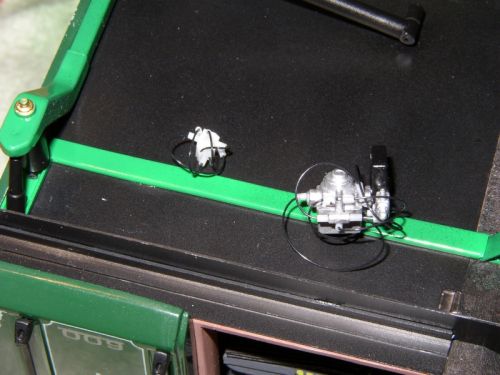
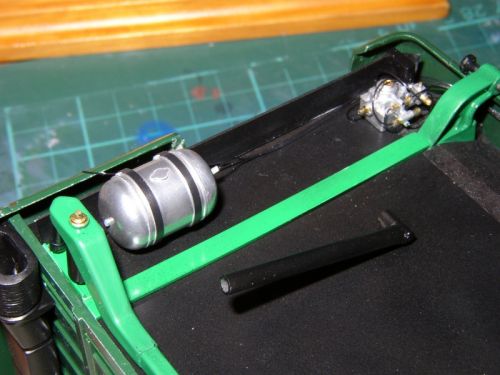
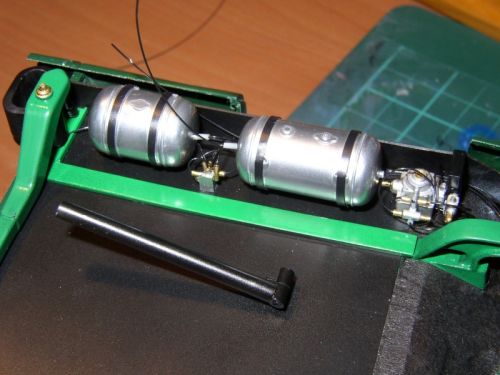
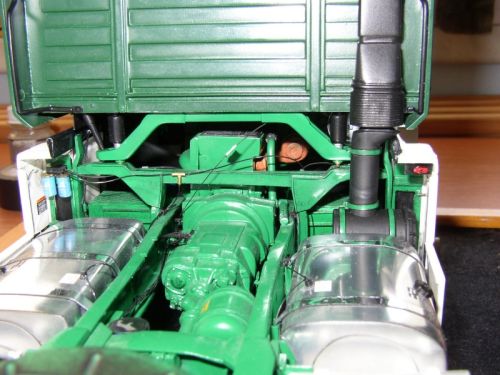
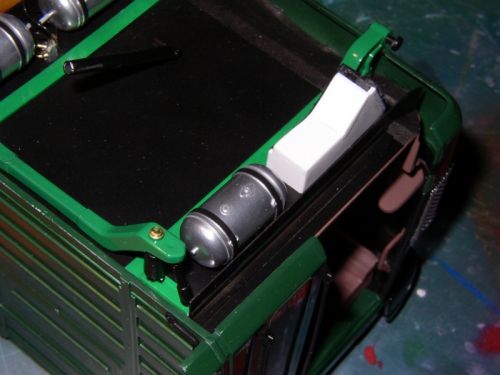
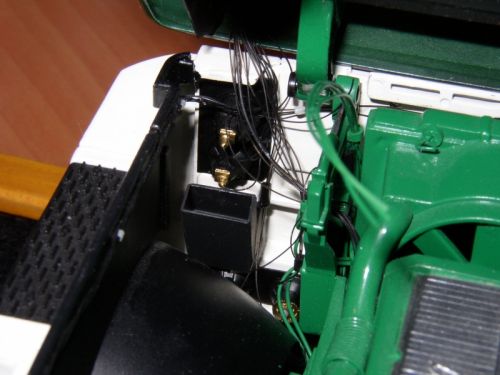
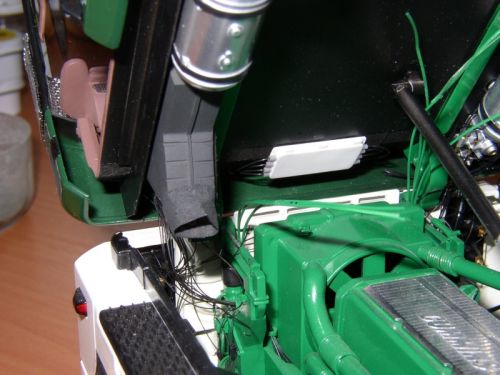
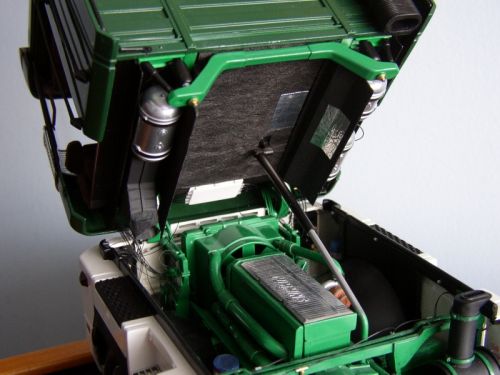
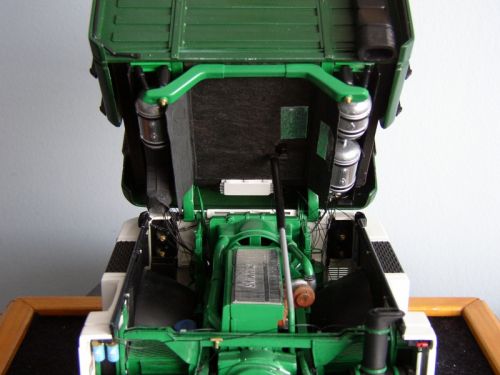
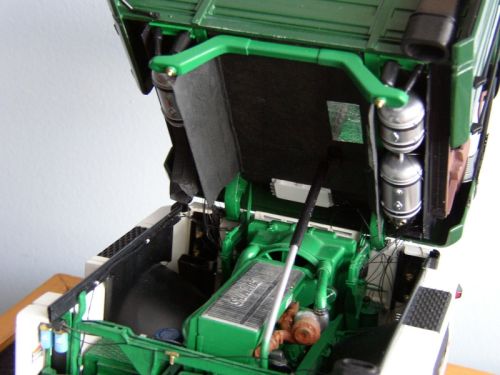
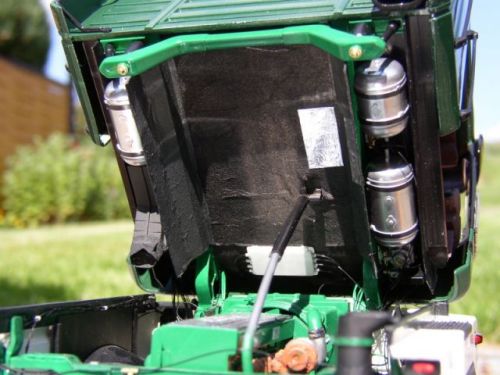
The cab floor required some serious work as well. It was covered with black sprayed plasticard as a basement for further detailing. It was fitted with a basic floor structure, black insulation fabric (made of a paper tissue), air tanks and related wiring and air valves, cab suspension, gearstick tow bar, cab heating air intake, engine control unit and few more details.
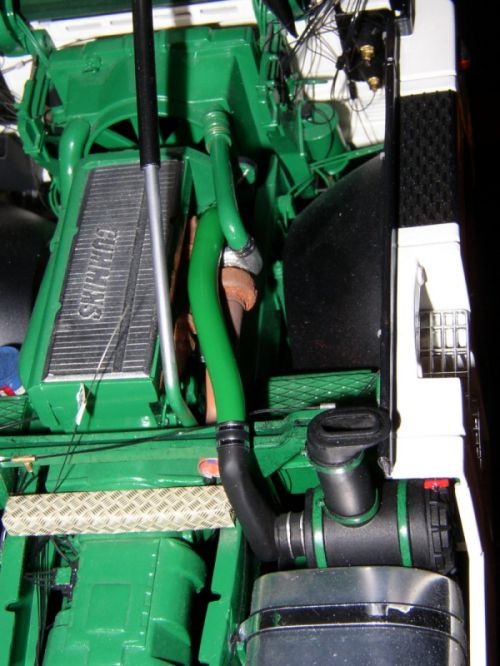
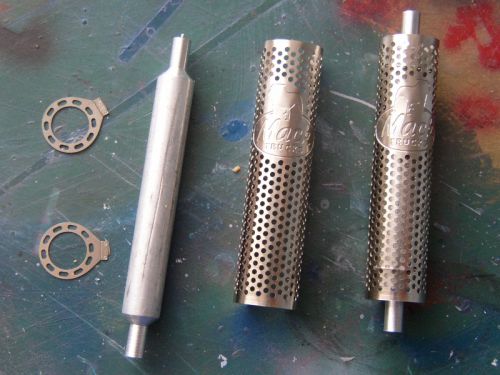

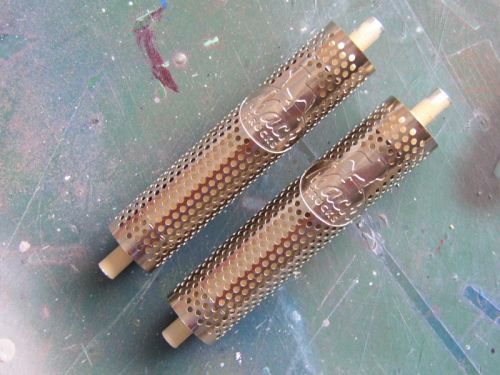
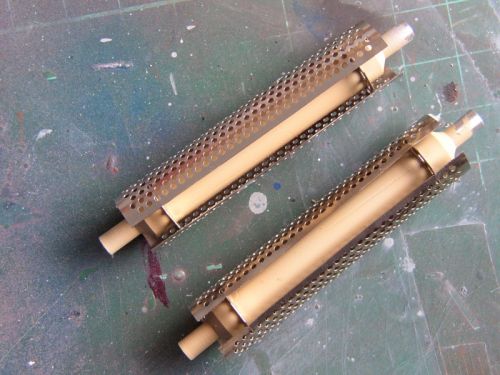
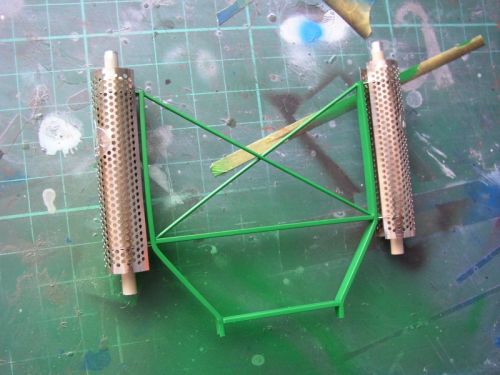
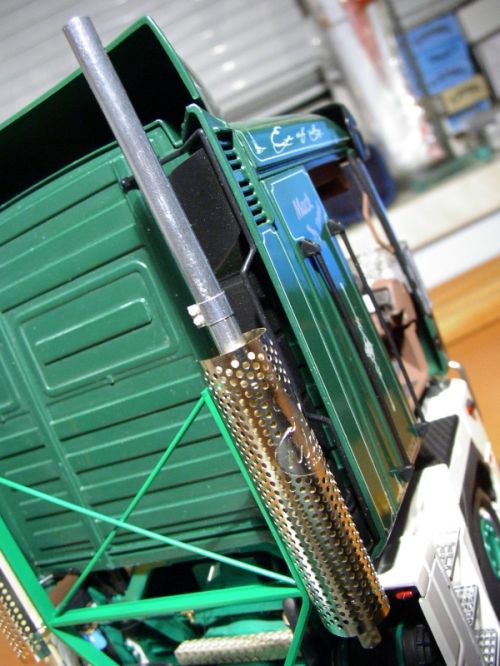
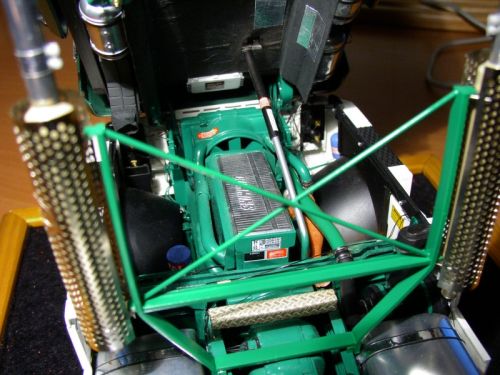
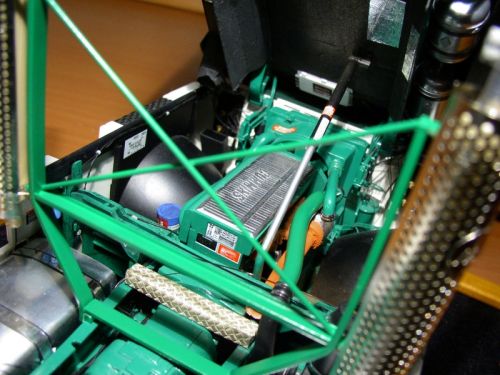
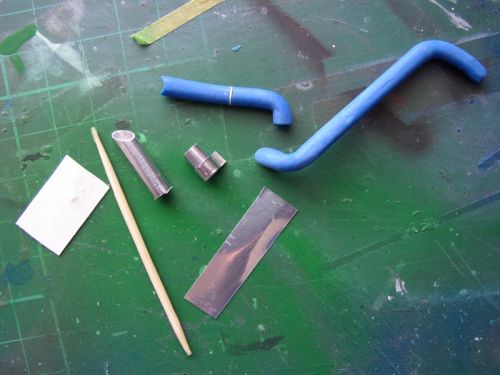
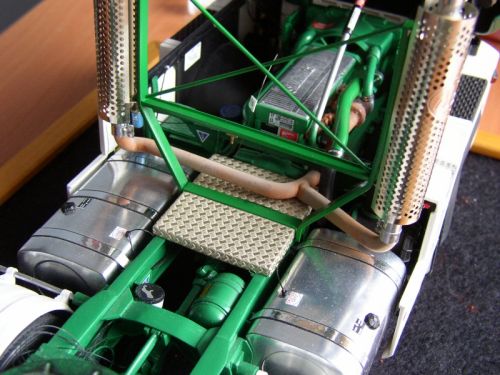
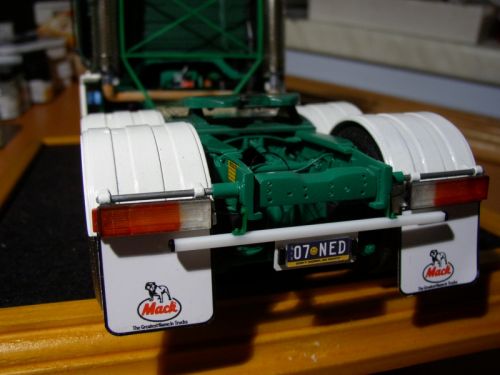
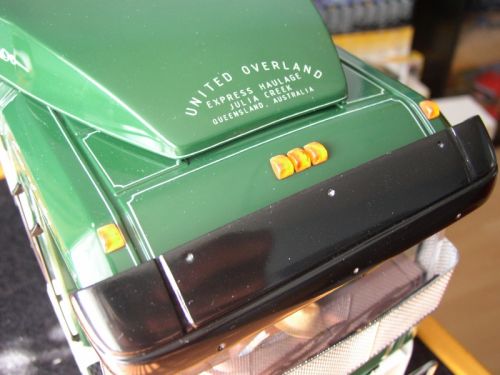
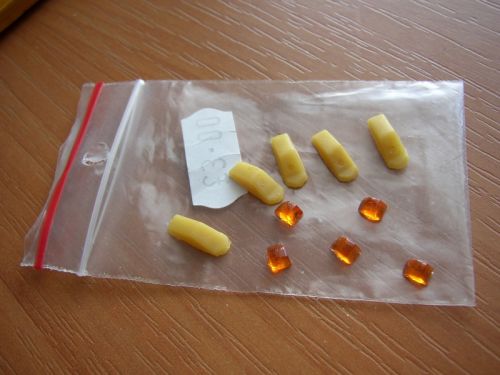
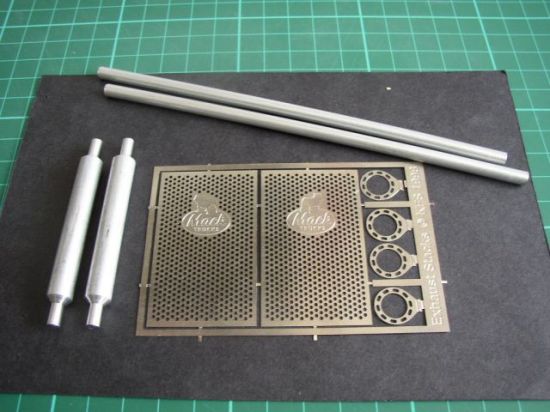
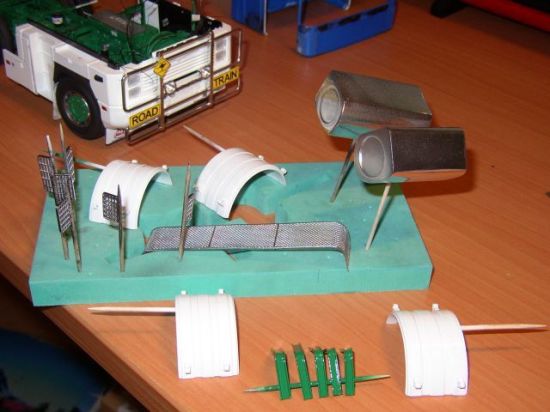
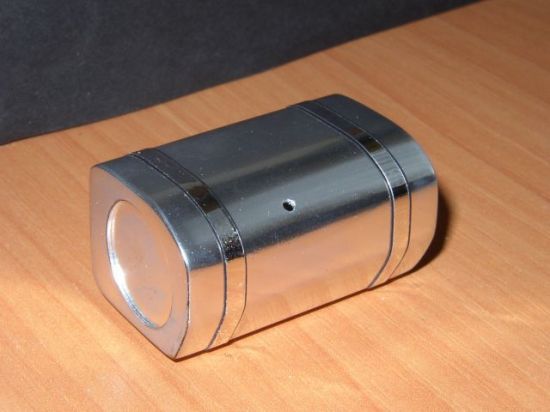
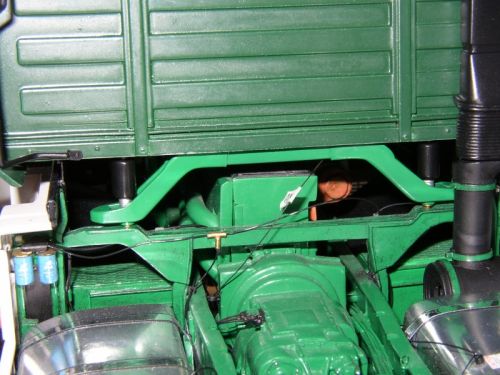
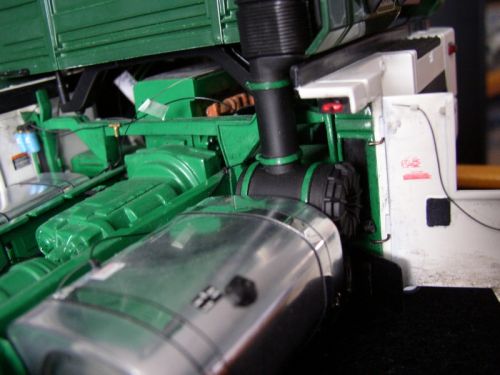
A turbocharger intake and exhaust manifold was made of a plastic rod heated above a candle and bent into the wanted shape. MIG and CMK pigments (light rust and standard rust and light dust) were used to create rusted exhaust manifold and the turbine spiral case. Few Plastruct profiles were used for creating the exhaust filters support bars with KFS aluminum exhaust filters with polished aluminum outlet pipes & etched shields. The rear bumper was made of a Tamiya plastic profile; number plates were printed to a gloss photo paper. Only the cab roof marker light lenses were used on the cab roof supported by massive alclad sprayed air horns from Italeri accessories set.
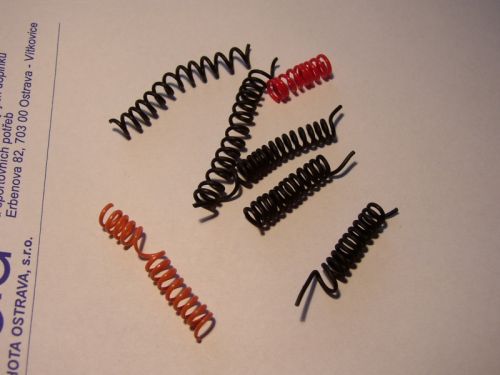
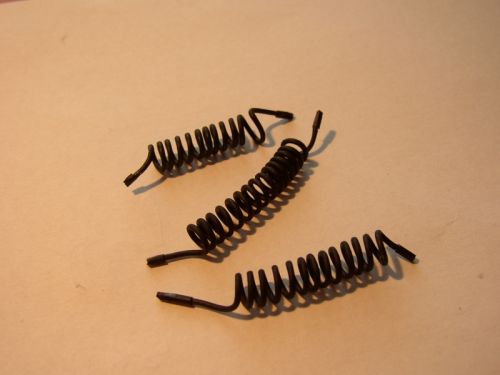
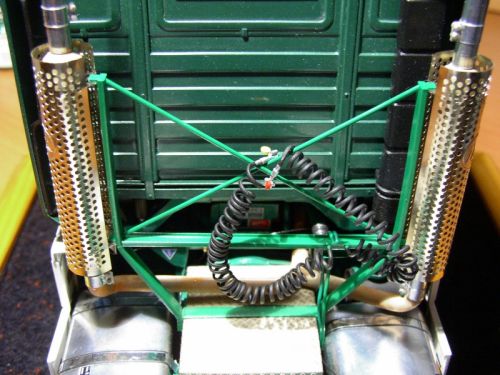
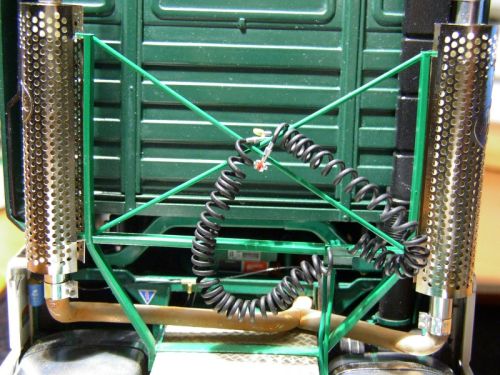
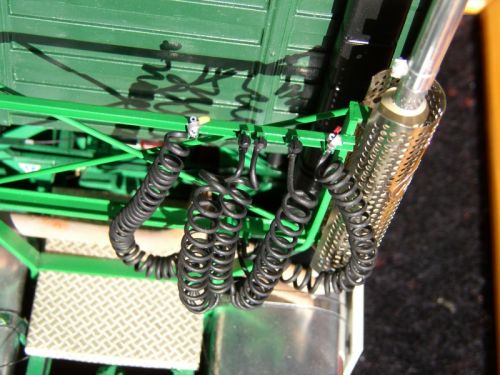
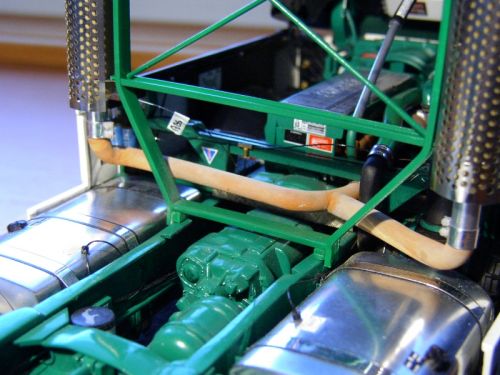
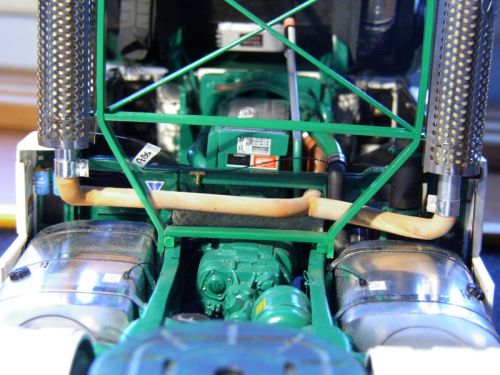
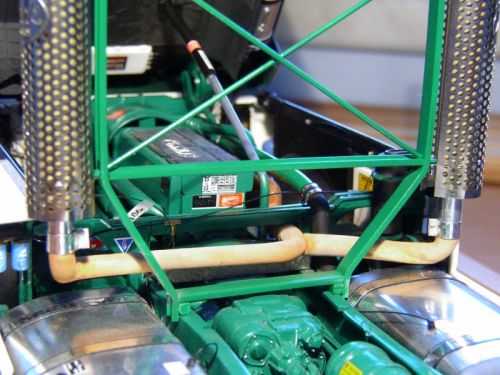
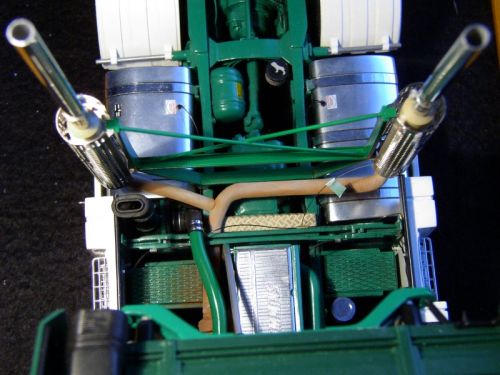
The last think I paid a serious attention to were the trailer connections hoses and couplings. The hoses are made of wire insulation (with wire itself removed), coiled around a pipe and heat fixed in a hot water. That gives them an appropriate shape but makes them flexible for possible trailer connection. The plugs and sockets are made of plastic rods as well as the air couplings. All parts were tiny and the job was a bit tricky but the result is fantastic.
The doors were polished and fitted with windows and locks, the cab mirrors were sprayed with flat black and got new glass made of Alclad sprayed and polished plasticards and the Mack’s bulldog logo out of KFS etch. All those parts were fitted to the cab and that was it! (The doors aren’t opening as I don’t yearn for working kit parts anymore.)
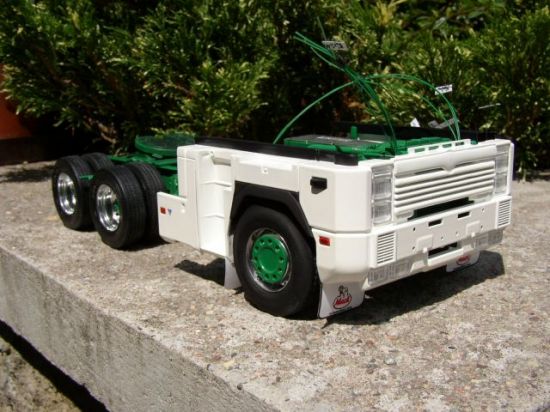
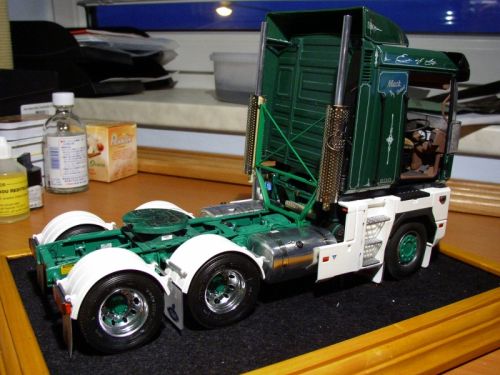
There was a mighty Magnum in front of me, just about 6 years and three months after the project started. I have to say I have never felt such relief and satisfaction in my life. It is not a perfect model. I know I could do many things different way, easier and faster or better already but that’s why I do this. To learn and bound forward with every new model finished. This model presents 6 years of my life, thoughts and ideas that will never be forgotten for me. Big story is over now.
Part four: Further noticeI wouldn’t do this again but after all I feel a sort of duty to say a few words about how to build Mack Magnum easier, faster and better than I did. I would scratchbuild the whole chassis at first using the Mack brochure dimensions. No resin frame extension. Then I would scratchbuild the axles and the suspension especially as the real thing is a bit different comparing to the kit parts but it’s quite easy to obtain its details and dimensions now. No more problems with Signature engine as it should be now available from Auslowe. I would also pay a lot more attention to the frame and front bumper strength as the whole kit is a damn heavy with all that resin and metal stuff and it’s quite difficult to move it and I wouldn’t try to make the doors opening (even if glued into position) as it made the cab construction a very tricky job.
Well, that’s all about my Mack Magnum from me. Thanks for reading.